Smooth animations using the QtQuick Canvas
Google's Material Design showcases a few nicely detailed animations that add life to the user interface. QML makes it straightforward to create the traditional moving, scaling and opacity change animations while taking advantage of the GPU, but how can we create an animation changing the shape of an element and not merely transforming it?
Today we'll see how we can use the QML Canvas item to create an animated simplified version of the Android's drawer and back arrow button.
We'll make sure that we use the GPU to accelerate the rendering and use standard QtQuick animations to control the drawing evolution, as conveniently as with traditional transform animations.
Since you can animate any property in QML, not only the built-in ones, you can define the animation parameters declaratively as properties and then use those as input for your JavaScript Canvas drawing code, requesting a repaint each time an input changes.
Drawing the base
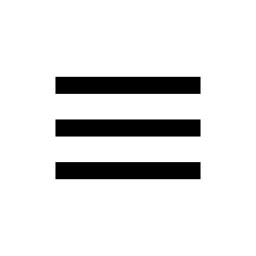
Let's start with a static rendering of our drawer icon, drawing three horizontal bars:
import QtQuick 2.0
Canvas {
    id: canvas
    width: 256
    height: 256

    onPaint: {
        var ctx = getContext('2d')
        ctx.fillStyle = 'white'
        ctx.fillRect(0, 0, width, height)

        var left = width * 0.25
        var right = width * 0.75
        var vCenter = height * 0.5
        var vDelta = height / 6

        ctx.lineCap = "square"
        ctx.lineWidth = vDelta * 0.4
        ctx.strokeStyle = 'black'

        ctx.beginPath()
        ctx.moveTo(left, vCenter - vDelta)
        ctx.lineTo(right, vCenter - vDelta)
        ctx.moveTo(left, vCenter)
        ctx.lineTo(right, vCenter)
        ctx.moveTo(left, vCenter + vDelta)
        ctx.lineTo(right, vCenter + vDelta)
        ctx.stroke()
    }
}
Which gives us:

Using QML properties to drive the animation
Then let's add the animation logic for the rotation. Use a State, triggered when the arrowFormState boolean property is true, make our whole drawing rotate by 180 degrees in that state and specify how we want it to be animated:
    property bool arrowFormState: false
    function toggle() { arrowFormState = !arrowFormState }

    property real angle: 0
    states: State {
        when: arrowFormState
        PropertyChanges { angle: Math.PI; target: canvas }
    }
    transitions: Transition {
        NumberAnimation {
            property: "angle"
            easing.type: Easing.InOutCubic
            duration: 500
        }
    }
Each time one of our animated values change, tell the canvas to paint itself:
onAngleChanged: requestPaint()
The Canvas is using the software rasterizer by default, this permits using functions like getImageData() without problems (which is slow if the pixels are lying in graphics memory). In our case however, we prefer having our drawing rendered as fast as possible to allow a smooth animation. Use the
FramebufferObject
renderTarget to use the OpenGL paint engine and the
Cooperative
renderStrategy to make sure that OpenGL calls are made in the QtQuick render thread:
    renderTarget: Canvas.FramebufferObject
    renderStrategy: Canvas.Cooperative
Finally simply use the animated value of our Canvas' angle QML property in our JavaScript drawing code:
    onPaint: {
        var ctx = getContext('2d')
        // The context keeps its state between paint calls, reset the transform
        ctx.resetTransform()

        // ...

        // Rotate from the center
        ctx.translate(width / 2, height / 2)
        ctx.rotate(angle)
        ctx.translate(-width / 2, -height / 2)

        // ...
    }
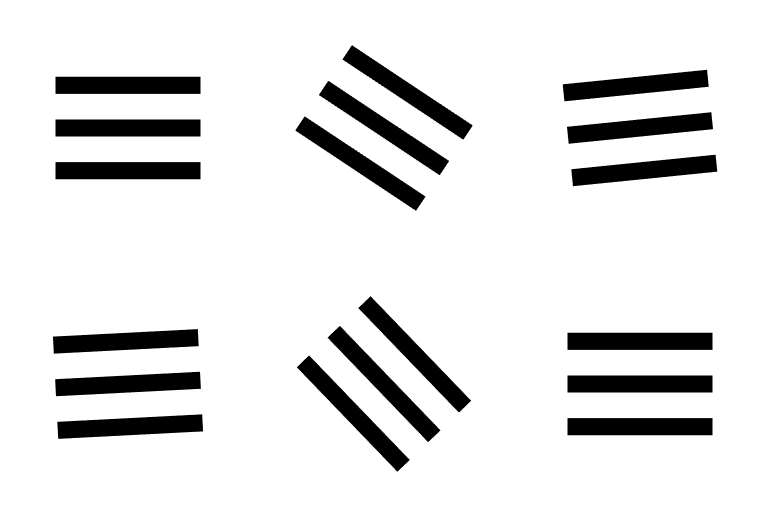
In practice we'll react to input events from a MouseArea, but for the sake of keeping the code simple in this demo we use a Timer to trigger a state change:
Timer { repeat: true; running: true; onTriggered: toggle() }
And this is what we get:

Taking advantage of existing animations
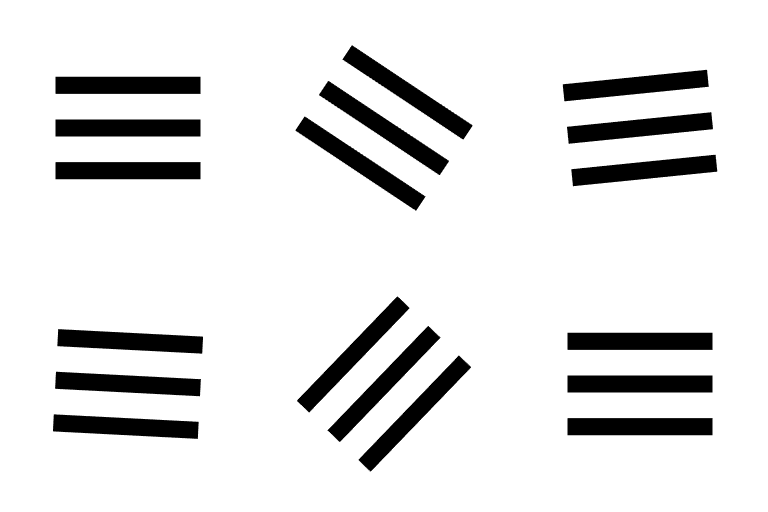
Pretty, although it would be nicer if the rotation would always be clockwise. This is possible to do with a NumberAnimation, but QtQuick already provides this functionality in RotationAnimation, we can just tell it to update our custom angle property instead. Since QtQuick uses degrees, except for the Canvas API which requires radians, we'll convert to radians in our paint code:
    states: State {
        when: arrowFormState
        PropertyChanges { angle: 180; target: root }
    }
    transitions: Transition {
        RotationAnimation {
            property: "angle"
            direction: RotationAnimation.Clockwise
            easing.type: Easing.InOutCubic
            duration: 500
        }
    }
    onPaint: {
        // ...
        ctx.rotate(angle * Math.PI / 180)
        // ...
    }
This time it rotates clockwise for both transitions:

Change the shape based on animation parameters
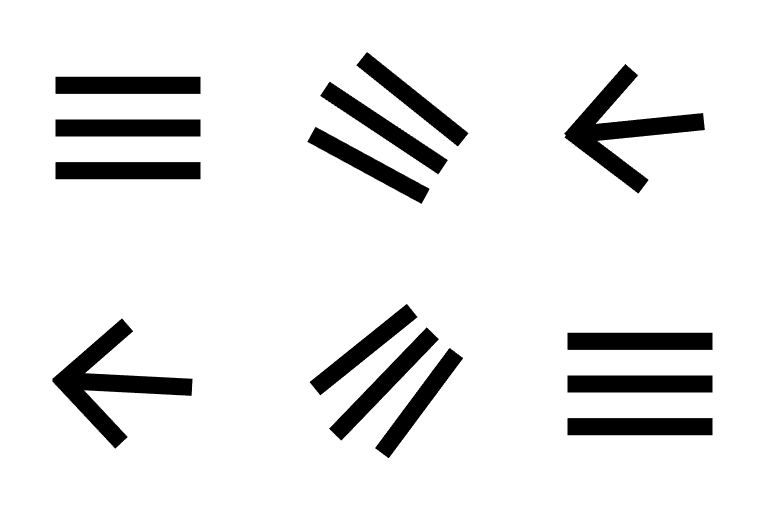
Lastly we'll add the morphing logic. Create a new morphProgress property that we'll animate from 0.0 to 1.0 between the states, derive intermediate drawing local variables from that value and finally use them to animate the position of the line extremities between state changes. We could use a separate property for each animated parameter and let Qt animations do the interpolation, but this would spread the drawing logic around a bit more:
    property real morphProgress: 0
    states: State {
        // ...
        PropertyChanges { morphProgress: 1; target: canvas }
    }
    transitions: Transition {
        // ...
        NumberAnimation {
            property: "morphProgress"
            easing.type: Easing.InOutCubic
            duration: 500
        }
    }

    onMorphProgressChanged: requestPaint()

    onPaint: {
        // ...
        // Use our cubic-interpolated morphProgress to extract
        // other animation parameter values
        function interpolate(first, second, ratio) {
            return first + (second - first) * ratio;
        };
        var vArrowEndDelta = interpolate(vDelta, vDelta * 1.25, morphProgress)
        var vArrowTipDelta = interpolate(vDelta, 0, morphProgress)
        var arrowEndX = interpolate(left, right - vArrowEndDelta, morphProgress)

        ctx.lineCap = "square"
        ctx.lineWidth = vDelta * 0.4
        ctx.strokeStyle = 'black'
        var lineCapAdjustment = interpolate(0, ctx.lineWidth / 2, morphProgress)

        ctx.beginPath()
        ctx.moveTo(arrowEndX, vCenter - vArrowEndDelta)
        ctx.lineTo(right, vCenter - vArrowTipDelta)
        ctx.moveTo(left + lineCapAdjustment, vCenter)
        ctx.lineTo(right - lineCapAdjustment, vCenter)
        ctx.moveTo(arrowEndX, vCenter + vArrowEndDelta)
        ctx.lineTo(right, vCenter + vArrowTipDelta)
        ctx.stroke()
        // ...
    }
Which gives us our final result:

Wrapping it up
This is a simple example, but a more complex drawing will both be more difficult to maintain and risk hitting performance bottlenecks, which would defeat the purpose of the approach. For that reason it's important consider the limits of the technology while designing the UI.
Even though not as smooth or responsive, an AnimatedImage will sometimes be a more cost effective approach and require less coordination between the designer and the developer.
Performance and resources
Yes we're using the GPU, but the Canvas also has costs to consider:
- Every Canvas item will allocate a QOpenGLFramebufferObject and hold a piece of graphics memory.
- Each pixel will need to be rendered twice for each frame, once onto the framebuffer object and then from the FBO to the window. This can be an issue if many Canvas items are animating at the same time of if the Canvas is taking a large portion of the screen on lower-end hardware.
- The OpenGL paint engine isn't a silver bullet and state changes on the Canvas' context should be avoided when not necessary. Since draw calls aren't batched together, issuing a high number of drawing commands can also add overhead and reduce OpenGL's ability of parallelizing the rendering.
- Declarative animations are great, but since we are writing our rendering code in JavaScript we are losing a part of their advantage and must accept a small overhead caused by our imperative painting code.
This leads us to our next blog post, next week we'll see how we can reduce the overhead to almost nothing by using a much more resource effective QML item: the ShaderEffect. You can subscribe via RSS or e-mail to be notified.
Complete code
import QtQuick 2.0
Canvas {
    id: canvas
    width: 256
    height: 256

    property bool arrowFormState: false
    function toggle() { arrowFormState = !arrowFormState }

    property real angle: 0
    property real morphProgress: 0
    states: State {
        when: arrowFormState
        PropertyChanges { angle: 180; target: canvas }
        PropertyChanges { morphProgress: 1; target: canvas }
    }
    transitions: Transition {
        RotationAnimation {
            property: "angle"
            direction: RotationAnimation.Clockwise
            easing.type: Easing.InOutCubic
            duration: 500
        }
        NumberAnimation {
            property: "morphProgress"
            easing.type: Easing.InOutCubic
            duration: 500
        }
    }

    onAngleChanged: requestPaint()
    onMorphProgressChanged: requestPaint()

    renderTarget: Canvas.FramebufferObject
    renderStrategy: Canvas.Cooperative

    onPaint: {
        var ctx = getContext('2d')
        // The context keeps its state between paint calls, reset the transform
        ctx.resetTransform()

        ctx.fillStyle = 'white'
        ctx.fillRect(0, 0, width, height)

        // Rotate from the center
        ctx.translate(width / 2, height / 2)
        ctx.rotate(angle * Math.PI / 180)
        ctx.translate(-width / 2, -height / 2)

        var left = width * 0.25
        var right = width * 0.75
        var vCenter = height * 0.5
        var vDelta = height / 6

        // Use our cubic-interpolated morphProgress to extract
        // other animation parameter values
        function interpolate(first, second, ratio) {
            return first + (second - first) * ratio;
        };
        var vArrowEndDelta = interpolate(vDelta, vDelta * 1.25, morphProgress)
        var vArrowTipDelta = interpolate(vDelta, 0, morphProgress)
        var arrowEndX = interpolate(left, right - vArrowEndDelta, morphProgress)

        ctx.lineCap = "square"
        ctx.lineWidth = vDelta * 0.4
        ctx.strokeStyle = 'black'
        var lineCapAdjustment = interpolate(0, ctx.lineWidth / 2, morphProgress)

        ctx.beginPath()
        ctx.moveTo(arrowEndX, vCenter - vArrowEndDelta)
        ctx.lineTo(right, vCenter - vArrowTipDelta)
        ctx.moveTo(left + lineCapAdjustment, vCenter)
        ctx.lineTo(right - lineCapAdjustment, vCenter)
        ctx.moveTo(arrowEndX, vCenter + vArrowEndDelta)
        ctx.lineTo(right, vCenter + vArrowTipDelta)
        ctx.stroke()
    }
    Timer { repeat: true; running: true; onTriggered: toggle() }
}
Woboq is a software company that specializes in development and consulting around Qt and C++. Hire us!
If you like this blog and want to read similar articles, consider subscribing via our RSS feed (Via Google Feedburner, Privacy Policy), by e-mail (Via Google Feedburner, Privacy Policy) or follow us on twitter or add us on G+.
Article posted by Jocelyn Turcotte on 04 May 2015
Click to subscribe via RSS or e-mail on Google Feedburner. (external service).
Click for the privacy policy of Google Feedburner.
Google Analytics Tracking Opt-Out
Loading comments embeds an external widget from disqus.com.
Check disqus privacy policy for more information.